Friday, August 31, 2012

Red Light Bars

Last night after I returned home from another gruelling day at the office (actually that's a lie... it wasn't bad at all), I decided that I wanted to whip up a rather delicious treat of the sweet variety. Having neither the time, nor the majority of the ingredients necessary to make something chocolaty, I did something that I have only done a handful of times... I used a mix. That's right, I went to the store wearing a scarf over my head and a pair of sunglasses over my eyes, and bought two boxes of baking mix. Don't judge me- I know you've done it and I bet you've even tried to pass it off as homemade.

After I shelled out the cash for my embarrassing purchase, I sped home and immediately turned up the heat (literally and figuratively) in the kitchen. Eggs were cracking, spatulas were spreading, and knives were cutting... and this is what I came up with... a delicious layered bar that boasts a chocolate chip cookie crust topped with sliced bananas and a layer of brownie. I call them Red Light Bars.

Why are they called Red Light Bars? Because they're super easy (like the women who hang out in the Red Light District) and because they rely on bananas to give them that extra little something (just like previously mentioned women). If this offends you, call them something cute... like monkey bars. However, for as long as I can get away with it (i.e. for as long as I don't have children), I'm going to keep this suggestive name and hope for the best.

Ingredients:
Chocolate Chip Cookie Mix
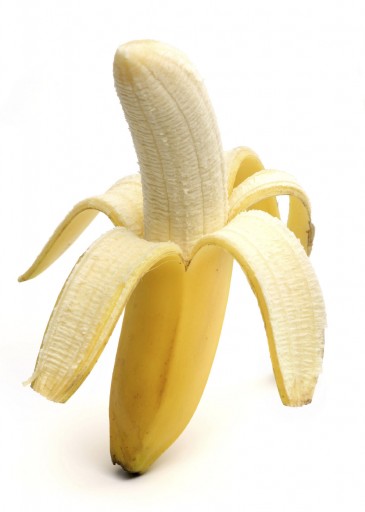
3 Bananas, sliced into 1/4" pieces
Brownie Mix (don't use anything but Ghiradelli or you'll be sorry)
All the ingredients that the mixes call for


Method:
1. Preheat oven to 350'.

2. Make cookie mix as directed, but add two additional teaspoons of oil.

3. Spread cookie dough into the bottom of a greased 13 x 9 baking pan.

4. Arrange sliced bananas over cookie dough. The slices should be touching. Don't be cheap.

5. Make brownie mix as directed on box. As specified previously, don't cheap out and buy anything other than Ghiradelli. Yes, it's a dollar more expensive than the "leading brand", but it tastes a heckkkk of a lot better and you can likely pass it off as homemade.

6. Spread brownie batter over the bananas. This is the most difficult part of the recipe because you'll have to exercise a little self control and do this carefully. You may fool yourself into thinking that there's not enough lovin' to go around, but think like a Red Light girl and understand that with enough spreading, all things are possible.

7. Bake for 30-35 minutes, or until a toothpick comes out clean.

I'm sure this recipe is better with all homemade batters, but as someone who never cuts corners in the kitchen, I figured I was allowed to cheat this one time, right?
Pin It

Monday, August 27, 2012

Cookie Dough Truffles

My last recipe was all about the weight loss, but since losing weight is so last season (i.e. I've given up), I figured it was appropriate to post a slam-dunk recipe for not just truffles, but for cookie dough truffles. Now you may be asking yourself, "Why do I need a special recipe for cookie dough truffles when I can make regular cookie dough or buy the scoop and bake crap from the store?" Well my friend(s), quite simply, you run the risk of dying if you don't the time to make this recipe. Fact. Actually, you probably won't die from eating raw cookie dough, but it could make you very sick and I'd prefer you not spend your sick/vacation time in the emergency room.

Truffles. What can I say about truffles other than the fact that they have in all honesty, contributed to my recent weight gain? Cookie dough. What can I say about cookie dough other than the fact that the cooked version of it has contributed to my recent sausage-esque appearance. Cookie dough truffles... Oh dear Lord, this could be bad news, but I'm willing to go on an all-water diet if that's what it takes to be able to stuff my face with these little balls of Heaven.

Ingredients:
1/2 cup unsalted butter, softened (I said softened, not melted. If you melt it, you're in for a BIG, messy surprise.)
3/4 cup light brown sugar
1 tsp vanilla
2 cups white flour (you could use wheat, but really... who are you kidding at this point?)
1- 14 oz can sweetened condensed milk (read: NOT evaporated milk)
1/2 cup mini chocolate chips
1/2 cup chopped walnuts (if you're going to skimp out on the nuts, double up on the chips)
2 bags of semisweet chocolate chips

Method:
1. Combine butter and brown sugar. Beat with a hand mixer until light and fluffy. Feel free to taste your mixture. It's good, isn't it?

2. Add vanilla.

3. Alternately beat in sweetened condensed milk and flour.

4. Retire your mixer for a sturdy spatula or spoon and mix in chocolate chips and nuts. Warning: You may develop a single diesel arm.

5. Roll into one-inch balls. Place on waxed paper and refrigerate for a couple of hours. Don't try to cut corners here... you need the balls cold and hard.

6. Over a double broiler (or if you know what you're doing, your microwave), melt the chocolate. With a toothpick, dip the truffles into the melted chocolate. Place back on lined baking sheets. Refrigerate until the chocolate is hard.

7. Join Weight Watchers. I'll see you there! :)
Pin It

Tuesday, August 21, 2012

Carrot Soup (You have 15 minutes, right?!)

History has never been my best subject, so the story I'm about to share may or may not be accurate. So during some war between the British and some other people, the very fawncy Englishmen heard that eating carrots would improve their eyesight. Therefore, in order to increase their odds of winning the war by being able to see their enemies, they gorged themselves with carrots. In fact, they ate so many that their skin turned orange! One summer day, my cousin and I, afraid of getting skin cancer, decided to test this theory and turn it into a rockin' tan. Our hue did not change, but I do believe we got sick because we each devoured about a pound of the orange stuff within a twelve hour period. Several years later, my mom got wind that I had been eating carrot soup for lunch and dinner for about a week straight and called to check up on me to make sure that my skin tone was not morphing into a certain color of the rainbow.
After realizing that the only part of my body that was affected by carrot soupapalooza was my weight (I lost eight pounds without trying). I decided to continue eating it for as long as I could stand. I have been making this recipe for a few years now, and it has yet to get old. It has the perfect blend of sweet and savory, and best of all, is loaded with vitamins. Also, it's a pretty awesome diet food because it's ridiculously low in calories but also extremely flavorful.

The measurements may not be totally exact due to the fact that I haven't actually measured anything other than the broth since 2009, but the instructions below should be more or less correct. Be daring and give my approximations a whirl. I mean- how bad can it be, right?

Ingredients:
1 pound-ish carrots, sliced into 1/2" thick chunks
6 cups chicken or vegetable stock
1 small onion, roughly chopped
1-2 cloves of garlic, pressed
pepper to taste

Method:
1. Locate the power cord, which should be connected to your crock pot. Insert into outlet.

2. Combine all ingredients.

3. Let cook on whatever setting you want. Need it in four hours? Done. Want to start this before work? Go ahead.

4. Once the cooking process has completed and the carrots are nice and soft, pour your soup (in batches) into a blender and puree the Hell out of it. Return each batch to large bowl or pot.

5. Combine all pureed batches and stir. If your soup is too thick for your liking, add water, and if so desired, a dash of salt. If it's too runny, oh well, better luck next time.
Pin It

Wednesday, August 15, 2012

Flippin' Delicious Apricot Chicken

I am crazy about turning ordinary food and ingredients into tasty, satisfying dishes that leave me feeling full without making me feel like I've just gorged on a few thousand calories. Additionally, I love trying new recipes, but often find myself taking someone else's ingredient card and modifying it about 90% of the way. That's how I came about the dish below. I wanted to find something to do with the apricot preserves that I'd just purchased, but the recipes that I found online all called for a package of french onion soup mix and a bottle of salad dressing. While they all got rave reviews and a full panel of orange stars, I steered clear. For starters, I didn't have any French onion soup mix (how dare I actually keep fresh onions in my cabinets), and because the very thought of loading my healthy chicken up with dressing made my stomach churn. Twice.

I can't offer you a comparison between my version of onion-y apricot chicken and the Lipton-salad dressing-apricot version, but I can definitely asssure you that the tasty delight that I'm moments from presenting will leave you wanting more and wondering why you've been marinating with only teriyaki for so long!

The served this with a side of veggie-sprinkled barley along with steamed broccoli. Perfect.

Ingredients:
2/3 jar apricot preserves
1 very small onion, chopped
1 tbsp butter
1/4 tsp-ish dried parsley (I only added this for color)
1 chicken bullion cube
2 cloves garlic
1 1/2 lbs chicken breast, sliced thin-ish

Method:
1. In a saucepan, melt the butter and saute the onions until they are slightly carmelized.

2. Add garlic and continue to saute for another minute.

3. Reduce heat and add preserves. Once the preserves have "melted", add parsley and bullion. With a spood, break the cube so that it gets distributed more easily.

4. Once ingrdients are incorporated, remove from heat.

5. Spoon preserve mixture over chicken breasts and allow to marinate. I let mine marinate for about 24 hours. You don't have to wait this long, but I did... because I'm awesome.

6. Preheat oven to 350'.

7. Bake for 20-30 minutes, depending on thickness of breasts.
Pin It

Monday, August 13, 2012

Cinnamon Raisin Breakfast Barley

Alright, alright. After giving a small break to those of you who read my blog religiously, I'm back with a few new recipes up my sleeve. For those of you who read every once in a while- shame on you, but thanks for reading this post. Hopefully you'll stick around for a little while, so as to not miss out on any more finger lickin' good food write-ups.

If you recall from my "Frisotto" recipe, I love barley because it's not only a whole grain, but also because it's packed with fiber and has a decent amount of protein. As someone who is quite fond of this grainy little pillow, I'm just as shocked as you are that I haven't eaten it for breakfast yet. I mean think about it... we eat whole grains for breakfast ALL the time, don't we? Oatmeal, toast, English muffins, cereal, but for some reason, barley's not on that list. Why?

So after having this epiphany that I should include this in my a.m feeding regimen, I decided to mess around in the kitchen and come up with something that was only slightly reminiscent of one of my favorite dinner side dishes. I decided to take the easy road and make a cinnamon raisin dish, and I'm so glad I did because it was so delicious. I ate it warm and poured about four ounces of almond coconut milk. I suggest you do the same.

Ingredients:
1 cup barley
5 cups water (Yes, this is more water than you would normally use, but I like my barley soft rather than chewy... especially when I'm eating it for breakfast)
4 tbsp brown sugar
1/4 tsp cinnamon
1/4 cup raisins
3/4 tsp lemon juice

Method:
1. Bring water to a boil

2. Once water has begun to boil, add barley, brown sugar, cinnamon, raisins, and lemon juice. Reduce heat to low.

4. Cover and let simmer for about 45 minutes. Make sure you watch your simmering concoction because if you don't, the sugary water will boil over and you'll end up with the horrible smell of burnt sugar.

5. After about 45 minutes, turn the heat off and let sit until all water has been absorbed.

6. Serve alone or with milk poured over.

** By the way, this makes about four to six servings.
Pin It

Friday, August 10, 2012

Sweet Luau Chicken

As of late, I have been experimenting with different marinades. While it's certainly easier to buy a bottle of whatever happens to be on sale, it's a better idea to make your own because not only can you control what chemicals go into it, but also you can alter the flavor to satisfy your current cravings.

I've always had an affinity for anything pineapple, but I've recently discovered that when mixed with other ingredients, it's awesome on chicken, especially in the summer time.

If you wanted to get super fancy and serve these as an appetizer at a party, you could modify the method and put the pineapple and chicken on skewers. You may also consider adding maraschino cherries to the ol' stick so as to add a pop of color. If you're planning to skewer up these bad boys, be sure to soak them in water for half an hour before threading the food on.

Ingredients:
1 can pineapple chunks + all the juice (Make sure you buy pineapple chunks in 100% juice rather than those which come in syrup. This is a sure-fire way to send your dish to Hell in a hand basket.)
1/4 cup soy sauce (it's okay to use the cheap crap)
1/4 cup orange juice
1/2 cup light brown sugar 
1/4 tsp cinnamon
4ish chicken breasts
a few tbsp brown sugar for sprinkling


Method:
1. In a small bowl, whisk together pineapple juice, orange juice, soy sauce, and brown sugars. Whisk until the sugar has dissolved. Now don't get your undies in a twist, because this should only take a couple of minutes.

2. Place trimmed chicken breasts in a prepared baking dish and pour marinade over chicken.

3. Arrange pineapple over chicken and sprinkle with brown sugar. Feel free to add a dash of cinnamon if you'd like; I fully support those who like to shake things up in the kitchen. For me, shaking things up usually involves a whole lot of arm waddle, so you know, I prefer to exercise my lot of creativity when the cucina is free of onlookers.

4. Allow to marinate for as long as you can stand. I allowed mine to chill out for about two hours.

4. Bake at 350' for 20-30 minutes, depending on how thick your breasts are cut. Don't be scared to perform a little plastic surgery and cut into the boobies. Remember, bigger isn't always better. Except of course, in the case of chocolate confections.
Pin It

Wednesday, August 8, 2012

Harry Potter's Treacle Pudding

In addition to whipping up a Shepherd's Pie to enjoy during the second Harry Potter movie, I also made a Treacle Pudding, which if you remember correctly, was the last thing that Mrs. Weasley made for her clan of gingers + Harry before they began their second journey to Hogwarts.

Now, this pudding is much different that the pudding that Americans are used to. I'm willing to bet that you probably think of Bill Cosby when you hear the word "pudding", and you probably remember licking the beaters from the electric hand mixer that your grandma used when she decided to bang out a treat that was sure to put a smile on your four-year-old Popsicle-stained face. Well let me tell you, my friends, this is nothing like that. It's actually more like a cake, but the difference between this and a cake is that it's more dense and it doesn't develop a crust on the edges due to the fact that it's steamed. You'll just have to see and taste for yourself.

I have to say that I was a bit skeptical about this pudding because it doesn't look like a very flavorful recipe, but my fears were abolished after taking the first bite. It wasn't nearly as rich as the luscious chocolate desserts to which I've become accustomed to eating, but rather, it was refreshing. Also, don't let the method scare you. It looks like a lot of steps, but it's actually really easy. I'll admit that I almost scrapped the idea because I was intimidated by placing a dish in boiling water and allowing it to steam my dessert to perfection. I'm so glad I didn't run for the hills!

Ingredients:
1 1/4 cup flour
1/2 tsp baking soda
1/2 tsp baking powder
1/8 tsp salt (you make think this is a trivial amount, but you'll be sorry if you forgo adding it!)
1 stick unsalted butter, softened
1/4 cup white sugar
1/4 cup golden syrup (Golden syrup can be found at Stop & Shop next to the Karo syrup. If you can't find this, try using light molasses.)
1 egg + 1 yolk
Zest of one lemon
Juice of 1/2 lemon
1/3 cup milk (I used whole, but I'm sure you could get away with skim)
Extra golden syrup for serving.

Method:
1. First and foremost, obtain a glass bowl with a lid. I used a 7 quart Pyrex one with a red rubber lid and it worked out just fine. Now grease and flour it.

2. Bring a pot that's larger than the bowl (in width and height) to a boil. Be sure that there is enough water to completely cover the bowl once you've placed it in. Do not place the bowl in yet.

3. In a large bowl, beat eggs, sugar, and butter until the mixture becomes thick. This should take about 5 minutes. If you've melted your butter and it never gets thick, don't worry... it'll still be fine.

4. Beat in lemon juice, and lemon zest.

5. In another bowl, combine flour, salt, baking powder, and baking soda. Mix together.

6. Alternately add milk and flour to your existing batter bowl. Make sure you're scraping the bowl with a spatula and whatnot.  Haven't you heard of the No Flour Left Behind Act?

7. Pour 1/4 cup of golden syrup into the glass bowl. Then pour the batter into the bowl. Put the lid on.

8. VERY carefully, place the bowl in the pot of boiling water. Turn the temperature down and put the lid on the pot and let the pudding simmer for about an hour and fifteen minutes or until a toothpick comes out clean.

9. Drizzle additional golden syrup over each slice when serving. Pin It

Sunday, August 5, 2012

Award- Winning Lemon Squares

No joke, my friends... these really are award-winning. In fact, when I was a mere Brownie Girl Scout, I entered a bake-off with these little gems, and happened to walk out with a blue ribbon! My seven year old self was so thrilled about this triumph, that I swore that I would never forget the recipe that earned me the right to brag to EVERYONE I know for years to come. I'm happy to report that I have yet to let anyone forget that I am a blue-ribbon baker.

So what's so special about this recipe that it deserves its own space on my blog? Well other than the fact that a panel of experienced judges deemed it to be absolutely divine, it does look rather cute when presented on a platter. What else is awesome about this dessert is that it's a no-bake recipe, which I continue to grow increasingly fond of as the seasonal temperatures steadily rise.

Since the onset of summer, I have developed quite an affinity for no-bake desserts. As someone who thoroughly enjoys baking, this comes as a shock to me, too, but who can resist whipping up something amazing without developing massive stains in the axillary region? Certainly not me.

Ingredients:
2 1/2 cups Nilla wafer crumbs (this is equal to one box)
1 stick unsalted butter, melted
1 box instant lemon pudding
8 oz cream cheese, brought to room temperature
2 cups whole milk

Method:
1. Make Nilla wafer crumbs by placing whole cookies in either a blender or a food processor. Once you have all of your crumbs, pour them into a bowl of melted butter. As previously stated in the "ingredients" section of this recipe, make sure it's unsalted. If you try to be slick and use salted, please don't tell anyone that you got the recipe from my blog.

2. Press crumbs into a 9 x 13 baking pan. If you have the time (and I strongly recommend that you do), put your crumb-filled pan in the fridge for about an hour.

3. In a large bowl, combine the milk, pudding mix, and cream cheese. A word to the wise: Make sure the cream cheese has been brought to room temperature and therefore softened before attempting to blend into the milk and pudding. Otherwise, your mixture will be rather lumpy regardless of how long you used the hand mixer to whip it into shape.

4. After you have used your hand mixer to blend the ingredients, pour over the chilled cookie crumbs. Smooth evenly with a spatula and make a very fancy design, such as the silhouette of an ancient raptor skeleton. If you don't think it's possible to make pudding art, I challenge you to try.

5. Let your masterpiece kick it old school in the fridge for a few hours before serving.

** You could very easily turn this into a pie... just an idea for those of you who think you're above serving rectangles. Pin It

Friday, August 3, 2012

Not Your Mama's Shepherd's Pie

It's likely that I am the last person on Earth to read the Harry Potter series, but I'm finally getting around to it, and am actually finding the books to be kind of exciting. So last night in an effort to embrace my budding Potter-inspired nerdiness, my lover and I decided to watch The Chamber of Secrets while indulging in a few recipes from the HP cookbook. We decided to make only dishes that were featured in the second book, which corny as it sounds, was actually pretty awesome. We made Treacle Pudding and Shepherd's Pie. Now, I assume that everyone who lives in the United States has eaten Shepherd's Pie at least once, but I can almost guarantee that you've never had it like this before! It's a bit more work than the traditional beef-corn-potato dish, but the extra effort is well worth it!

If you want to take the easy way out and use instant potatoes, go ahead, but it definitely won't taste the same. However, as someone who believes in eating home-cooked meals as much as possible, I'd rather see you go to town with potato flakes than to catch you dining at your neighborhood Burger King. You may not be aware of this, but you can eat like a "king" even in the comfort of your own home. You can even wear this to complete the experience. Just make sure you send me a picture.

Anyway, without further ado, I present an awesome recipe for Shepherd's Pie that will knock your socks straight into the hands of poor, self-injurious Dobby.

Ingredients:
1 1/2 lbs ground animal (I used a 20 oz package of ground turkey, and it was perfect)
1 small onion, chopped
2 tbsp oil
1 large carrot, chopped
1 cup chicken stock (I ghettofied this recipe by using a bouillon cube)
2 tbsp tomato paste
1-2 cloves garlic
Potatoes, chopped (I used about ten smallish ones that come in a 5 lb bag, but in the end, your amount of potatoes should be about equal to three russet potatoes)
3/4 cup milk
1 stick butter (yeah, it's a lot, but whatevs!)
1/4 tsp garlic powder (or to taste)
2 tsp salt
pepper to taste

Method:
1. Preheat oven to 350'. Prepare a deep 9 x 9 dish with non-stick spray.

2. Boil potatoes.

3. In one pan, brown whatever form of ground beast you choose.

4. In the meantime in another pan, saute the onions and garlic in 2 tbsp oil.

5. After about five minutes, when the onions begin to look semi-transparent, add tomato paste, chicken stock, and carrot. Allow to simmer for about 10 minutes or so. The carrots should begin to get soft and the sauce should begin to thicken.

6. Add meat to vegetable mixture and once combined, spread in the bottom of pan.

7. When the potatoes are done (I expect you know when to stop boiling potatoes), drain them. Return to pan, and add butter, milk, garlic, salt, and pepper. Use a hand mixer to free them of cellulite-looking lumps. Sigh... If only a hand mixer would solve that problem on my thighs. Cellulitis disappearus! Ugh... it's tough being a Muggle.

8. Spread potatoes over meat mixture and bake for 35-45 minutes.

9. Use a memory charm to banish your old recipe for Shepherd's Pie from your mind. Pin It

Wednesday, August 1, 2012

Sweet and Sour Chicken (Wicked freakin' good!)

Can we please have a conversation about making recipes that received five stars from over 140 reviewers? Here's the sitch: After about half an hour of searching, I thought that I'd stumbled upon a knock-your-socks-off recipe. And why wouldn't I have thought that? It was from the Food Network website, had received five stars from a boat load of reviewers, and used only ingredients that I already had in my house. A-Plus? I think not. The Food Network, of all websites provided me with one of the most vile recipes I've ever tried. Said recipe, as written, was absolutely disgusting and actually made me cry before I waved my magic wand and made more modifications than I care to count. I seriously started crying because I thought I'd ruined dinner. However, being the master chef that I am, I saved the meal and served up something that tasted incredible... and not just compared to what I'd started out with, either.

The measurements that I'm about to mention might be SLIGHTLY off due to the fact that I had to make so many on-the-fly modifications, but they should be accurate enough to cause a black-tie dance party in your mouth.

Ingredients:
1/3 cup apple cider vinegar (the original recipe actually called for 1/2 cup, but I used my better judgement and automatically reduced to 1/3... and thank the Good Lord because any more would have brought not only tears to my eyes, but also vomit to my lips.)
1/2 cup brown sugar
2 tbsp white sugar
1.5 tbsp cornstarch mixed with 2 tbsp water (combine and shake together in a tightly sealed container)
1 can chunk pineapple + all the juice
1/4 cup orange juice
2 lbs chicken breast, cut into cubes (use scissors to do this... it's much easier that slicing and dicing with a sickle or whatever you modern kitchen folk use)
Cooked rice (I used brown)

Method:
1. In a large frying pan, combine the apple cider vinegar, brown sugar, white sugar, orange juice, and pineapple juice. Heat until the sugars have completely dissolved.

2. Once sugars have dissolved, add the cornstarch-water mixture and quickly, but gently stir.

3. Once the sauce begins to thicken, add the pineapple. Let the pineapple simmer in the sauce for about 5 minutes.The sauce should continue to thicken.

4. Let the chicken party with the pineapple. Cook chicken for about 5 minutes, or until the pieces are no longer pink inside.

5. Serve over rice and then mosey on over to GrossFoodNetwork.com and tell Sandra Lee to pucker up to your well-fed bottom! Pin It