Showing posts with label chocolate. Show all posts

Monday, April 8, 2013

Chocolate Pistachio Icebox Cupcakes

As you may know by now, I gave up baking for Lent, which has since passed, but I have yet to have a moment to update my blog. That's not true; I just haven't felt interested in sharing lately. But I'm back and in generous form!

So as usual, I threw a birthday party for four of my coworkers, and although I ordered the majority of the food from LaSalle Bakery (OMG YUM!), I simply could not let a party pass without bringing something in. Add to that, the fact that the celebration took place two days before St. Patricks's Day, which meant that I felt compelled to make something green. Predicament #1: I had a sneaking suspicion that my coworkers (who think I'm crazy anyway) would not appreciate me blending up spinach smoothies. Predicament #2: I could not bake. What's a girl to do, what's a girl to do?

I pondered this for several weeks (hours, actually), and then it hit me. Icebox cake... in individual form! I'll admit that I was so excited about this idea that I bought the wafer cookies with which I would construct my masterpieces, one month in advance of the party. And there they sat in my cabinet, longing to be eaten. Worst month of my life, really.

So anyway, these are ridiculously easy, and would actually make a great kid-friendly kitchen project. I'll have to keep this in mind for when I have a slew of children running around my home.

Ingredients:
A box of thin wafer cookies. There is a Swedish brand that makes them.
1 pint heavy whipping cream
1 box pistachio pudding (Or you can use whatever you want)- Do not buy sugar free unless you enjoy the taste of chemicals.
Food coloring, if desired
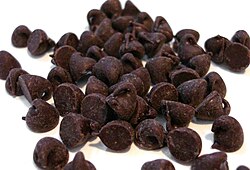
Stuff to sprinkle on top. I wish I'd had rainbow sprinkles, but it seems as though mini CC's were all that were taking up residence in my food decoration pantry.


Method:
1. Combine heavy whipping cream and pudding in a large bowl.

2. With a hand mixer, beat the cream mixture for about five minutes, or until it reaches a thick, creamy consistency. This is actually how I make frosting the majority of the time!

3. Determine how high you want your cupcakes to be. These were made with three cookies. Then, count your cookies and divide them up!

4. Arrange wafer cookies into single layers and pipe or dollop whipped cream onto the bottom cookie. Press another cookie on top of the cream, and repeat.

5. Pipe one more dollop on the top cookie and sprinkle with fancy stuff, if desired.

6. Refrigerate for at least 8 hours so that the cookies get soft. I let my chill (ha ha... I love puns) overnight, then brought them to work in the morning, and served them around 1pm.


Pin It

Tuesday, February 12, 2013

Double Chocolate Lovehandles

Have you ever had one of those days (okay, fine, months) when all you want to do is ravenously devour all forms of chocolate? Do you ever have those mornings  when you weigh yourself and swear off all food for the next seven days in order to get back down to your normal weight? Well, my friends, I have those months and mornings all the time. Everyday, in fact.

As you may have noticed by now, I simply adore chocolate... especially brownies. The problem with brownies, though, is that each batch only makes about 16 squares, thereby forcing you to consume a portion of cellulite-in-the-making that may be satisfying to the taste buds, but not to your pants, which barely even button when laying down on your bed, sucking in your stomach, by the way. That's why I was determined to make something that tasted like a brownie, but was only a portion of the size. A smaller portion, to be exact.

The brownie cookie. I won't tell you that I consumed fewer calories than I would have had I made real brownies, but I will tell you that every delicious bite was totally worth it. I basically subsisted off these and salty ghetto noodles during the recent snow storm, but ended giving away two dozen to my gracious neighbors who helped me to dig my car out from behind a five-foot snow bank. True story, my friends. It's a darn good thing I gave them away, too because after consuming over a dozen on my own, I was beginning to wonder if I had ANY self-control. I mean seriously-- what girl eats a dozen cookies when she has the ability to sip on an avocado smoothie before it rots in a non-working fridge? A single girl who doesn't have anyone to look sexy for, that's who.

I didn't take cookies because I forgot. So sorry to have inconvenienced you.

Anyway, let's go on, shall we? These cookies are really delicious, but really rich, so watch out now! I tried these when they were warm (against my better judgement because I'm not a fan of warm cookies), and thought they were icky. Once I let them solidify, though, I decided that they were as tasty as can be and definitely blog-worthy. So what are you waiting for? Make 'em!

One last thing... I should warn you that the dough is effing amazing. I actually reserved a container of raw dough for snacking on later. A wise decision.

Ingredients:
2/3 cup unsalted butter
1 1/2 cups brown sugar
2 eggs
1 tsp vanilla
1 1/2 cups flour
1/3 cup cocoa powder
1/4 tsp baking soda
1/2 tsp salt
2 cups chocolate chips

Method:
1. Preheat oven to 375'.

2. In a large bowl, cream together the butter and brown sugar. Incorporate eggs and vanilla.

3. In another bowl, sift together flour, baking powder, salt, and baking soda.

4. Slowly add the dry ingredients to the wet. Add chocolate chips. Taste the dough. It's so delicious, right?

5. Drop by tablespoonfuls onto ungreased cookie sheets and bake for 10-12 minutes. I say 10-12, but mine definitely took 12 minutes.

6. Allow to cool slightly before moving to cooling racks. I always store my cookies in the fridge to extend their shelf life. It works amazingly well.

Yield: 4 dozen Pin It

Monday, February 4, 2013

Eat Your Hips Off Double Chocolate Clusters

"What the fuck? You're asking me to eat my hips off?" No, I'm asking you to make cookies that are made with ingredients that aren't bad for you. In fact, these are probably a good indulgent "diet snack" for you to stock your cookie jar with. Jeesha kapeesha!

These cookies are awesome! They're soft, smooth (not gritty in the least), and best of all, super flavorful! They're made with whole wheat flour, oats, and a bit o' olive oil. See what I mean? I'm willing to bet these dream clouds contain fewer than 100 calories each. It's a damn good thing, too, because I seriously ate six of them over the weekend. And yet I still managed to step on the scale this morning and see that my weight is only 1.6 pounds from where I'm comfortable, and down 1.8 pounds from the week before. Score!

This is a really easy recipe that should be fool-proof. The biggest problem I had was keeping my fingers out of the bowl and away from my mouth. I wish I could wear this dough as lipstick. That may look weird, though, right? It may not complement my skin tone.

Ingredients:
6 tbsp butter, softened in such a way that... nevermind.
2 tbsp olive oil (of course if don't have olive oil, you can just use more butter)
1 egg
1/2 cup white sugar
1/2 cup brown sugar
1 tsp vanilla
1/2 tsp cinnamon
1/2 tsp salt
1/2 tsp baking soda
1 tsp baking powder
3 tbsp cocoa powder
1 cup whole wheat flour
1 1/4 cup oats (I always use old fashioned)
1/2 cup-ish chocolate chips

Method:
1. Preheat oven to 350'.

2. In a large bowl, combine all of your wet ingredients.

3. In a small bowl, combine all dry ingredients, less chocolate chips.

4. Slowly incorporate dry ingredients into wet. Use a hand mixer and grind the oats ever so slightly. You don't have to do it this way, but that's how I did mine, and they were fabulous! And I mean f-a-b-o-l-o-u-s. BTW, I love this song. I know, it's a shocker considering my main musical squeeze tends to be David Crowder. But I digress.

5. Stir in chocolate chips.

6. Drop rounded teaspoonfuls of dough onto ungreased cookie sheet.

7. Bake for 8-10 minutes. You won't be able to tell when these are browned, so just use your best judgement. Allow to cool on baking sheet for 5 minutes before moving to cooling racks.


Pin It

Friday, January 18, 2013

Almond Flour Triple Cs

Okay, so I suppose I lied about only cooking and baking food items with ingredients that are found in an ordinary kitchen, as the cookie recipe that I will soon unveil requires the use of  almond meal. Now, almond meal isn't so uncommon, but it also isn't considered a staple in the average American household.

The other day, I had the brilliant idea to milk a bunch of almonds in order to save money on the packaged stuff at the market. As it turns out, if you make your own almond milk, you'll undoubtedly be left with a crap-ton of almond meal. As I am somewhat like a Native American in that I try to use "every part of the buffalo" I could not let the byproduct of my milk go to waste. I did some googling and realized that I could almost use the almond meal like wheat flour. No kidding, huh?

This is how the almond flour chocolate chip cookie was born. I'll admit that I was a bit skeptical, and I mean, who wouldn't be? I was basically replacing a whole grain with a nut. I've replaced flour with legumes with great success, but never with a nut. UNTIL NOW.

When these bad boys came out of the oven, I swear my downstairs neighbors must have thought that I had a special friend over because of my reaction of ecstasy! "Ohhh my Godddd! Soooo good!!!" may have slipped off my tongue a few times. You have no idea. If you like chocolate and nuts together, you are in for a real treat, my dear.

Also, because these do not contain any flour, they're gluten-free. They also have fewer carbs than traditional chocolate chip cookies, being that they're not made with real flour. It is only fair to offer you this warning, though: Almond meal does contain significantly more fat that traditional flour. But fear not, young skeptic. The fat content is mainly comprised of monounsaturated fatty acids (MUFAs), which are actually good for you. They can help lower cholesterol, and when you replace empty calories with MUFA calories, you may actually lose weight. GTFO, I know! For those of you who would like it in layman's terms, it's full of good fat.

So without further ado, I present the gluten-free, super MUFA-powered chocolate chip cookie!

Ingredients:
3 cups almond meal
1 stick unsalted butter
2 eggs
1/2 cup light brown sugar
1/2 tsp baking soda
1/2 tsp salt
1 tsp vanilla
shake of cinnamon (per usual)
chocolate chips as you see fit (chocolate chips are also a MUFA food)

Method:
1. Preheat oven to 375'.

2. In a large bowl, combine butter, eggs, brown sugar, and vanilla. Beat until nice and fluffy.

3. Mix dry ingredients. Give it a good stir and scrape down the sides with a spatula.

4. Add chocolate chips and mix.

5. Drop by rounded tablespoons onto an ungreased cookie sheet. You should get about 3 dozen.

6. Bake for 10-12 minutes.

Pin It

Tuesday, January 15, 2013

Accidentally Delicious Brownies

You can tell by their namesake that these brownies turned out deliciously by accident. The truth is, they are the result of several massive fuck ups, but it turns out that my inattention to detail actually had a positive ending this time. Hosannah!

I know this is a crappy picture, but what do you really
want from me at 10:30pm? You're lucky you got this!
As I wandered around my apartment in my flower-print bathrobe last night, I was overcome by a tremendous urge to experiment with a new recipe. Therefore, I whipped out a cookbook given to me ten years ago, flipped straight to the brownies section, and decided on a recipe that didn't call for a lot of butter (I didn't want to waste it on a recipe that may have failed). The recipe was simple enough: Put butter, water, and sugar in a saucepan. Melt, then add chocolate chips. Then, combine baking soda, flour, and salt in another bowl. Two strikes. Then I realized that I didn't have any vanilla left. Three strikes, and you're out. Halt! Not so fast!

I quickly worked my magic and made the necessary modifications to prevent a potential disaster from occurring. I don't like warm brownies, so I had to wait till the morning to find out that God was looking down on me when I scrambled around the kitchen that fateful evening. 

Ingredients:
2/3 cup flour
1 scant tsp baking powder (original recipe called for 1/4 tsp baking soda)
1/4 tsp salt
12 oz bag of chocolate chips (I used minis)
2 tbsp unsalted butter
2 tbsp water
1/2 cup sugar
2 eggs
1 tsp almond extract (original recipe called for vanilla)
Generous sprinkle of cinnamon (this wasn't in the original recipe, but I added for good measure)
I hope I'm not forgetting anything critical

Method:
1. Preheat oven to 325'. 

2. In a saucepan, combine sugar, water, and butter. Heat over a low flame and stir continuously until the butter is melted. I accidentally added the sugar to the flour, which meant that I was heating only the butter and water. Whatever. 

3. Once your butter mixture is melted, stir in half of the chocolate chips and stir until smooth and melty. Pour into a mixing bowl. Add eggs and almond extract.

4. Combine flour, baking powder, and salt. Add to your chocolate mixture. Scrape bowl with a rubber spatula.

5. Mix in remaining chocolate morsels. 

6. Pour into a prepared baking dish and level out by shaking. I believe I used an 8x8.

7. Bake for 25-30 minutes. My oven is a little bit ghetto, so I think it took about 30 minutes to get these suckers cooked all the way. 

8. Allow to cool completely and stuff your face with chocolatey goodness.


Pin It

Monday, January 7, 2013

Cinna-licious Chocolate Bar Cookies

I've been on a blogging hiatus for a while, but I'm back, biotches. I don't know if you're crying tears of joy or agony, but either way, I'm glad you're expressing some sort of emotion on the subject! So with that in mind, I've been a sort of emotional wreck lately, and the only solace I can seem to find is in baking.


That's how I came to whip up this bitchin' batch of bar cookies that will certainly leave your tastebuds longing for more. It's likely that you'll also provoke me to be sad more often so that I'll deliver more tasty recipes. If this is the case, kindly remove yourself from my social circle. Otherwise, please feel free to send me lavish gifts as a token of gratitude.

So one of my favorite flavor combinations  is cinnamon and chocolate. I don't know why, but whenever these flavors share a recipe, the results are amazing. This is true 100% of the time, especially in the case of hot cocoa. I shall also tell you that these are NOT blondies. So far, I have remained anti-blondie throughout the course of my life due to the fact that I loathe butterscotch, especially in chip form. Traditional blondies are merely a cop out for people who can't bake, but would like to give off the appearance of  having spent hours in the kitchen. Here's why: All that sugar shocks your nerves and the human body doesn't know what to think. So, it says, "Oh, sugar! It must be delicious!" And before you know it, you have a band of loyal followers banging down the kitchen door of some poor schmuck who can't bake for crap. Oh, was that mean? Oh well.

Ingredients:
1 stick unsalted butter
1 cup all-purpose flour
1 1/2 tsp baking powder
scant 1/2 tsp salt
1 cup light brown sugar
1 egg
1 egg yolk
1 tsp cinnamon
1 cup chocolate chips (Use Ghiradelli!)

Method:
1. Preheat oven to 350'.

2. Grease a square baking dish. I prefer glass.

3. Melt butter and brown sugar together over a low flame. Stir constantly. Once the sugar is melted in, wait ten minutes.

4. Beat in egg and yolk.

4. Mix in cinnamon, salt, and baking powder.

5. Add flour. Once the flour is well incorporated, stir in the chocolate chips. Dip your finger in and lick the scrumptious batter off. Oh la la.

6. Pour the batter into the baking dish and pop that bad boy into the oven and let it bake for about 25 minutes.

7. Allow to cool completely before slicing into 16 squares.


Pin It

Wednesday, October 31, 2012

Mocha Almond Cuppycakes

So the other night, the boyfriend and I had a small dinner party. Being that I have been on a sort of cupcake roll lately, I decided to continue down that path and experiment with flavors a bit. Well experiment, I did, and the results were tremendous! The rich blend of chocolate and coffee was amazing, but the icing on the cake (pun intended) was the sweet frosting that just pulled it all together.

I am absolutely in love with almond flavoring, and have been ever since my cousin and I made nearly half a ton of these Italian cookies which feature it as the main ingredient. It is uh-may-zing. I kid you not. So anyway, because I'm obsessed with it, I try to use it whenever I can. This recipe seemed perfect.

Mocha almond cupcakes. How can I describe them? They taste SLIGHTLY coffee-ish, but mainly like very dark chocolate. Unless you know there's coffee in there to begin with, you probably won't be able to taste it, but what you WILL be able to taste is decadence.


Ingredients:
---Cupcakes---
1 cup + 2 tbsp white flour
1/2 cup cocoa powder
1 cup sugar
1 egg
1 stick unsalted butter, softened
1 tsp vanilla
1 tsp salt
1 tsp baking soda
1 cup cold coffee (I used regular, but I may try hazelnut next time, and believe me- there WILL be a next time!

---Frosting---
2/3 cup cocoa powder
1/3 cup milk
3 cups powdered sugar
1 tsp almond extract
1 tsp vanilla
1 stick unsalted butter, softened

Method:
1. Preheat oven to 350'.

2. In a large bowl, cream together butter and sugar. Add egg and vanilla.

3. In a smaller bowl, combine baking soda, cocoa powder, flour, and salt.

4. Slowly begin to add the dry ingredients to the butter mixture. Alternately add coffee. Continue alternating dry ingredients and coffee until all ingredients are incorporated.

5. Pour batter into 18 prepared baking tins (sprayed and floured or lined).

6. Bake for about 18 minutes or until toothpick comes out clean.

7. While the cupcakes are baking, make your frosting.

8. With a hand mixer, combine the butter, almond extract, and vanilla extract.

9. Slowly add cocoa powder alternately with milk.

10. If the frosting is too thick, add more milk. If you accidentally thin it out too much, add a little more powdered sugar. It's not too difficult to whip up a batch of frosting, now is it?

11. Decorate with a piping bag or with a spoon. Garnish with almonds, if desired.

Pin It

Monday, October 8, 2012

Double Chocolate Banana Bread

Just when I thought that my recipe for banana bread couldn't get any better, I went ahead and added a little bit of this and a little bit of that to achieve a level of chocolaty perfection that was previously unheard of. Seriously, my final product was absolutely sensational. In fact, it was so sensational that it almost forced me to give up on my diet for the day. But ah! I didn't HAVE to give up on my half-assed diet due to the fact that the recipe calls for applesauce instead of butter. Yeah, yeah... I know. I'm back talking about applesauce as a substitute, but seriously. It's an awesome swap and if you're not yet a a believer, this is the recipe to try as a first step.

Now not to pat myself on the back or anything (who am I kidding? I adore self-praise), but I really do have a knack for switching up my recipes and making them even better. Let the applesauce sub and the addition and subtraction of cocoa powder and flour, respectively, serve as evidence of my talents. I also added mini chocolate chips, but that's amateur stuff, so I'm not really looking for loads of credit on that one.

Ingredients:
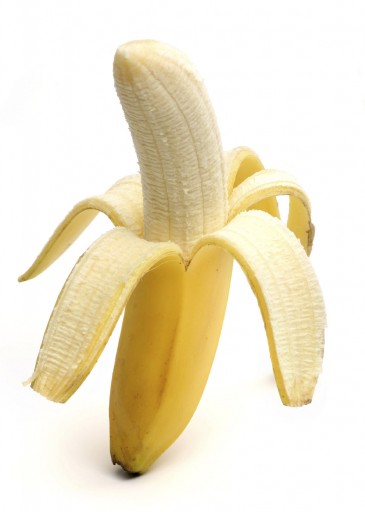
3 very ripe and spotty bananas, smashed to baby food-ish consistency
1 cup + 2 tbsp sugar
2 eggs
1/2 cup applesauce
1/4 cup + 2 tbsp cocoa powder
1 tsp salt
1 tsp baking powder
1 tsp baking soda
1/4 cup mini chocolate chips (You must use minis, otherwise the regular-sized chips will sink to the bottom of the pan and you'll find yourself in a mess that I'm not willing to help you crawl out of)

Method:
1. Preheat oven to 350'.

2. In a large bowl, mix mashed banana, sugar, and eggs together. Add applesauce and stir until well incorporated.

3. In a smaller bowl, mix cocoa powder, flour, salt, baking power, and baking soda.

4. Slowly add dry ingredients to the wet ones. Stir and scrape bowl.

5. Add mini chocolate chips and stir.

6. Pour batter into a prepared loaf pan. Sprinkle top with mini chocolate chips if desired.

7. Bake for an hour.

I usually wrap my loaf in saran wrap almost immediately after it comes out of the oven. This traps in the moisture and keeps it tasting amaaayyy-zing. Also, I usually make this at night and let it sit till the morning. Breads and muffins always taste best when they've have time to rest and the flavors have had time to marry.

P.S. I'll post pictures soon, as I am currently too lazy to fetch my camera.
Pin It

Wednesday, September 19, 2012

Super Easy Diet-Friendly Brownies

As you can tell, I am quite the chocolate fanatic. Yes, I do eat foods other than those of the chocolate variety, but I haven't posted the recipes because they've been too simple (a whole baked chicken), repeats of old posts, or things that I haven't bothered to measure out. For example, I whipped up a side dish of whipped cauliflower/red potatoes. I didn't really measure my seasonings, so I figured that would be a pretty crappy post for a recipe blog.

Anyway, I've been doing really well on my diet and aside from the tablespoon of mini chocolate chips that I sprinkle on top of my plain yogurt, I haven't really been spoiling myself with the good stuff. That's why today, with my diet in mind, I pulled out "Old Reliable". Old Reliable is a ridiculously easy brownie recipes that calls for two ingredients. And while it won't leave you groaning, "Oh my goodness gracious, that's the best brownie I've ever had in all of my life," it will definitely satisfy your chocolate craving without forcing you to unbutton your pants. Don't judge me... you know you've done it while no one's looking.

So the two ingredients are black beans and a box of brownie mix. "What's up with the mix?!" you might be asking yourself. Well, my dear friends, the answer is quite simple. Creating a batch of brownies that each measure 2 x 2 and contain only 110 calories is easier that way. Sure, I've found recipes for "healthy" brownies, but the recipes are usually so disgustingly altered that there's no possible way that it could even taste like a brownie, let alone any sort of delicious treat. Also, even if I did do it the "right" way, I would have to spend like sixty big ones on a single batch. Here are my instructions to you: If you're seriously counting calories and aren't afraid to make a compromise in order to save yourself $56, make these. Like I said, they're not the most FABULOUS things you've ever tasted, but it certainly does the trick when your other option boasts three times the calories.

Ingredients:
1 can of black beans, drains
Water
I box of Ghiradelli brownie mix (Do yourself a favor and splurge on the Ghiradelli. The first time I made this, I bought the bargain brand. Let me tell you, they were so disgusting and fake tasting that I threw them out. Yup yup... I threw the whole God-forsaken tray out, which if you know me, is a deal of epic proportions.)

Method:
1. Preheat the oven to 325'.

2. Pour rinsed beans back into can. Fill said can with water.

3. Empty beans and water into blender and puree for a few minutes.

4. Empty brownie mix and bean puree into a bowl and mix, baby, mix!. There's nothing like burning calories while baking up a storm.

5. Pour batter into prepared 13 x 9 pan and pop the sucker in the oven for 30 minutes.

** A 13 x 9 pan will yield very thin brownies, but if you're contemplating making this, you're already conscious of portion sizes, right? Correct.

6. The next day, jump onto your scale and rejoice over the fact that you haven't packed on a few pounds! GO YOU!!
Pin It

Sunday, September 9, 2012

Thick Fudgey Brownies

I have kept this recipe tucked away in my vault for over fifteen years. Yes, that IS a long time considering I'm twenty-six and swiped this recipe when a family friend brought it over when I was in second grade. Like my gluten-free brownies, these are not your run-of-the-mill generic cake-y brownies to which you have likely become accustomed. They are dense, rich, and usually require a beverage of some sort to help them go down. A little trail of drool just trickled out of the corner of my mouth? TMI? TB.

So last weekend, I made a pan of these for my boyfriend to bring into work. He proudly marched through the can't-stop-me-now doors, set my June Cleaver style Tupperware carrying container down in the break room, went downstairs, and after about five minutes, returned back only to find a completely empty container! Immediately upon his return, his two dozen hungry coworkers promptly lifted him into the air and began chanting with forceful enthusiasm, "You're Number One!" After the commotion ceased, the students let him down and returned to work. However, before he was able to leave the room, the resident old lady warned him that he was taking over her role as the purveyor of fine baked goods and that danger would ensue if the nonsense continued. He was not intimidated, however, knowing that his girlfriend was armed with her silicone spatula and get-ready-for-war measuring spoons, along with a hefty repertoire of recipes that would send any novice baker running for the hills.
It's possible that I'm exaggerating a little, but the brownies were consumed within five minutes, my lovely boyfran did not get to enjoy one, and the resident old lady did clearly convey the message that she felt threatened by the new sweetshop in town.


Ingredients:
4 squares unsweetened baking chocolate, melted
(or 3/4 cup unsweetened cocoa + 1/4 cup canola oil)
2 cups white sugar
1 cup flour
2 sticks unsalted butter
1/2 bag chocolate chips
4 eggs
1 tsp salt
1 tsp vanilla

Method:
1. Preheat oven to 350'.

2. In a large bowl, cream together sugar, vanilla, and butter. Add eggs one by one.

3. If you're using unsweetened cocoa and oil rather than melted baking chocolate, add the oil now. If not, add the melted chocolate.

4. In a smaller bowl, combine salt, flour, and baking powder (if using).

5. Slowly incorporate flour mixture into the wet ingredients. After all ingredients are well combined, add chocolate chips.

6. Pour batter into a prepared 13 x 9 baking pan.

7. Bake for 30-35 minutes.
Pin It

Friday, August 31, 2012

Red Light Bars

Last night after I returned home from another gruelling day at the office (actually that's a lie... it wasn't bad at all), I decided that I wanted to whip up a rather delicious treat of the sweet variety. Having neither the time, nor the majority of the ingredients necessary to make something chocolaty, I did something that I have only done a handful of times... I used a mix. That's right, I went to the store wearing a scarf over my head and a pair of sunglasses over my eyes, and bought two boxes of baking mix. Don't judge me- I know you've done it and I bet you've even tried to pass it off as homemade.

After I shelled out the cash for my embarrassing purchase, I sped home and immediately turned up the heat (literally and figuratively) in the kitchen. Eggs were cracking, spatulas were spreading, and knives were cutting... and this is what I came up with... a delicious layered bar that boasts a chocolate chip cookie crust topped with sliced bananas and a layer of brownie. I call them Red Light Bars.

Why are they called Red Light Bars? Because they're super easy (like the women who hang out in the Red Light District) and because they rely on bananas to give them that extra little something (just like previously mentioned women). If this offends you, call them something cute... like monkey bars. However, for as long as I can get away with it (i.e. for as long as I don't have children), I'm going to keep this suggestive name and hope for the best.

Ingredients:
Chocolate Chip Cookie Mix
3 Bananas, sliced into 1/4" pieces
Brownie Mix (don't use anything but Ghiradelli or you'll be sorry)
All the ingredients that the mixes call for


Method:
1. Preheat oven to 350'.

2. Make cookie mix as directed, but add two additional teaspoons of oil.

3. Spread cookie dough into the bottom of a greased 13 x 9 baking pan.

4. Arrange sliced bananas over cookie dough. The slices should be touching. Don't be cheap.

5. Make brownie mix as directed on box. As specified previously, don't cheap out and buy anything other than Ghiradelli. Yes, it's a dollar more expensive than the "leading brand", but it tastes a heckkkk of a lot better and you can likely pass it off as homemade.

6. Spread brownie batter over the bananas. This is the most difficult part of the recipe because you'll have to exercise a little self control and do this carefully. You may fool yourself into thinking that there's not enough lovin' to go around, but think like a Red Light girl and understand that with enough spreading, all things are possible.

7. Bake for 30-35 minutes, or until a toothpick comes out clean.

I'm sure this recipe is better with all homemade batters, but as someone who never cuts corners in the kitchen, I figured I was allowed to cheat this one time, right?
Pin It

Monday, August 27, 2012

Cookie Dough Truffles

My last recipe was all about the weight loss, but since losing weight is so last season (i.e. I've given up), I figured it was appropriate to post a slam-dunk recipe for not just truffles, but for cookie dough truffles. Now you may be asking yourself, "Why do I need a special recipe for cookie dough truffles when I can make regular cookie dough or buy the scoop and bake crap from the store?" Well my friend(s), quite simply, you run the risk of dying if you don't the time to make this recipe. Fact. Actually, you probably won't die from eating raw cookie dough, but it could make you very sick and I'd prefer you not spend your sick/vacation time in the emergency room.

Truffles. What can I say about truffles other than the fact that they have in all honesty, contributed to my recent weight gain? Cookie dough. What can I say about cookie dough other than the fact that the cooked version of it has contributed to my recent sausage-esque appearance. Cookie dough truffles... Oh dear Lord, this could be bad news, but I'm willing to go on an all-water diet if that's what it takes to be able to stuff my face with these little balls of Heaven.

Ingredients:
1/2 cup unsalted butter, softened (I said softened, not melted. If you melt it, you're in for a BIG, messy surprise.)
3/4 cup light brown sugar
1 tsp vanilla
2 cups white flour (you could use wheat, but really... who are you kidding at this point?)
1- 14 oz can sweetened condensed milk (read: NOT evaporated milk)
1/2 cup mini chocolate chips
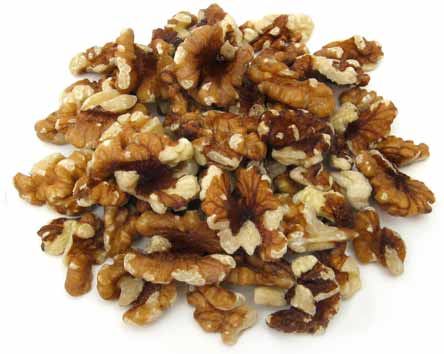
1/2 cup chopped walnuts (if you're going to skimp out on the nuts, double up on the chips)
2 bags of semisweet chocolate chips

Method:
1. Combine butter and brown sugar. Beat with a hand mixer until light and fluffy. Feel free to taste your mixture. It's good, isn't it?

2. Add vanilla.

3. Alternately beat in sweetened condensed milk and flour.

4. Retire your mixer for a sturdy spatula or spoon and mix in chocolate chips and nuts. Warning: You may develop a single diesel arm.

5. Roll into one-inch balls. Place on waxed paper and refrigerate for a couple of hours. Don't try to cut corners here... you need the balls cold and hard.

6. Over a double broiler (or if you know what you're doing, your microwave), melt the chocolate. With a toothpick, dip the truffles into the melted chocolate. Place back on lined baking sheets. Refrigerate until the chocolate is hard.

7. Join Weight Watchers. I'll see you there! :)
Pin It

Monday, July 30, 2012

Best Ever Chocolate Chip Cookies

I have experienced my fair share of chocolate chip cookie disasters, but after years of searching, I finally found (and perfected) one that never, ever fails. For all you die hard Tollhouse fans... forget about it. That "classic recipe" produces cookies that don't always rise,  sometimes spread too far, and get oddly crispy for no apparent reason. My spectacularly delicioso recipe always cranks out flavorful delights that puff up in the oven, and after they've been out of the blasted heat box for about 45 seconds, fall just enough to form sugary-chocolate valleys of goodness. Yum... they're chewy, moist, and have amazing texture.They spread just enough to look normal, but never get flat. You all know what I'm talking about... we've all opened the oven after 8 minutes, expecting to see golden pillows with gorgeous glowing chunks of chocolate, but instead see this ridiculous mess of nearly transparent, paper thin cookie dough with chocolate chips standing fully erect. That's when the tears start flowing and the swear jar begins to overflow with 20's.

NO MORE. The recipe I am about to present will never leave you swearing off baking ever again. In fact, you might even gain a few pounds because you'll be making these SO often. For real. Let's get started.

Ingredients:
2 1/4 cup white flour (I know... no whole wheat!)
3/4 cup packed light brown sugar
1/4 cup white sugar
2 eggs
1 tsp baking soda
1 package instant vanilla pudding (Do not buy sugar free unless you like things that taste disgusting)
1 tbsp vanilla extract (this is not a typo. TBSP)
1 bag chocolate chips (I always use Ghiradelli. Go big or go home, right?)
2 sticks unsalted butter, softened, NOT melted (I usually use cold butter and mash it with a fork, but you don't have to do that... just don't use melted butter)

Method:
1. Strap on your jazziest apron.

2. Preheat oven to 375'.

3. Combine butter, eggs, vanilla, white sugar, and brown sugar. Mix until all ingredients are fully incorporated.

4. Add pudding mix to sugar-y egg mixture. Now add baking soda. Mix like Hell.

5. Slowly add flour. Once all flour has been mixed in, add chocolate chips.

6. Drop by spoon fulls onto UNGREASED cookie sheets. You should get about four dozen.

7. Bake for 8-10 minutes.

8. Brag to all your friends about how you make a bangin' chocolate chip cookie that puts their beloved Nestle recipe to shame. Pin It

Monday, July 9, 2012

Cake Balls or Mini Nightmares?

Cake balls. What can I say about them other than the fact that when you look at the recipe, all you can think is, "I got this!"? The truth is, they require very few ingredients and in theory are very easy to make, but usually end up taking more time than they're really worth.

Given the level of effort associated with this dessert, I propose to change the name to Cake Truffles.

Here's the recipe that seems to catch many peoples' eyes and lead them to believe that they can whip up a cute dessert in less than an hour and look like a rockstar at their next office party.

Ingredients:
1 can frosting
1 box of cake mix
1 bag of chocolate chips (I use Ghiradelli for everything)

Method:
1. Bake cake as directed on box.

2. When cake comes out of the oven, let cool for a few minutes. Proceed to crumbling to dust.

3. Mix entire can of frosting into crumbs.

4. Roll into balls.

5. Melt chocolate over double broiler. Let's get real here... most of us will probably do this in the microwave and forget that chocolate burns easily. It'll probably sit in the micro for two minutes on high before the kitchen begins filling up with smoke and the fire alarm starts going off. The family dog will start barking and the baker will run into the kitchen repeatedly muttering, "OH sh*t!' under her breath. I don't judge. This happened to me once. I was five.

6. Coat the balls in chocolate and decorate as desired. If you want to decorate with sprinkles or anything comparable, do this while the dang schweddy balls are still wet, otherwise you'll have a mess and will be stammering the SH word once again.

Okay, so this sounds easy enough, right? WRONG! Do you know long the process of actually rolling out seriously like... 100 balls takes? I usually do 15 before I give up. So after I've rolled 15 balls, I realize that I still have to coat them in chocolate. I usually do one before realizing that I'm tired and this process sucks royally. I then proceed to spooning the melted chocolate over the top, which looks just fine and usually earns me a few compliments at what ever function I serve them at.

MY ADVICE TO YOU:
Do not make these. You can clearly taste that the frosting is from a can, and the time you put into it is just not worth it. Oh, so you're ambitious and want to make your own frosting, huh? Please leave my blog and never come back. For real... it is not worth it. If you want something chocolate-y and special to bring to a casual party, make brownies (recipe to come soon) instead. Your time is better spent trimming the grass blade-by-blade with a pair of safety scissors. Pin It